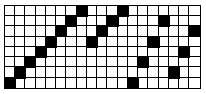
If the expression specifies fewer ends than are in the design, the ends you have specified are repeated across the design.
For example, if you have specified 200 ends in your design and you enter “2(1-8) 1 2 1 2” as your threading expression, which only defines the threading for the first 20 ends, the result will be your 20-end pattern repeated 10 times, as though you had actually entered
“10( 2(1-8) 1 2 1 2).”

 indicating that you can now
paste (this is the Paste cursor).
Move the paste cursor to the
upper left hand corner (thread-ing)
or upper right hand corner
(peg plan, tie-up, or treadling) of
where you want to paste, and
click. The contents of the clip-board
will overlay the selected
portion of the design. You may
paste over and over again, as
many times as you wish.
indicating that you can now
paste (this is the Paste cursor).
Move the paste cursor to the
upper left hand corner (thread-ing)
or upper right hand corner
(peg plan, tie-up, or treadling) of
where you want to paste, and
click. The contents of the clip-board
will overlay the selected
portion of the design. You may
paste over and over again, as
many times as you wish.